I remember the first time I visited my friend Jim at college many years ago. Upon walking into his small two person dorm room, the first thing I noticed was all the Polaroid photos hanging around his door frame – of smiling friends and a few funny faces. Jim had a tradition of taking a Polaroid picture when someone new visited him – a way to remember all the great people that one encounters at college. I’ve always had a love of candid photography – photos the capture the essence of a moment or a person. Photobooths and Polaroids are great tools for capturing candid pictures – they’re easy, quick, and produce a tangible result.
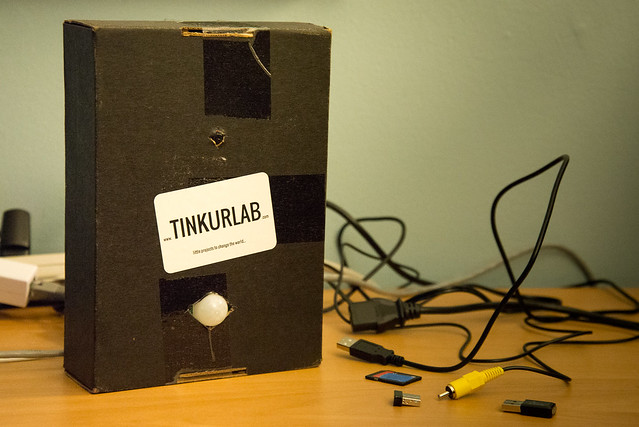
A basic prototype of TinkurBooth.
While I still love the Four Frames Photobooth, it takes a bit of time to transport, set up, and take down. Although Four Frames Photobooth has had a busy life – attending multiple weddings, a few business parties, and even a happy hour – I wanted something the would be, well, easier, quicker, and a ‘lil bit more playful. Meet TinkurBooth – a platform for taking quick and candid photos with endless possibilities for innovation.
TinkurBooth was my first project using a Rasberry Pi. Many of TinkurLab’s creations have already used microcontrollers such as the Arduino. However, I’ve been looking for an excuse to try a Raspberry Pi. Not only are Pis cheap ($30-40) the Pi Camera module is also cheap ($30) and you can use a cheap ($10) wi-fi adapter for connectivity – < $100 for a photobooth is a pretty good deal. And honestly, there’s just something geekily awesome about taking pictures using shell commands and switches!
“And honestly, there’s just something geekily awesome about taking pictures using shell commands and switches!”
I wanted TinkurBooth to be more then a “once and done” photobooth. I wanted it to be a platform for experimentation and play – for trying new ideas. Coming from my day job as an agile leader and coach, I am often reminded about the countless opportunities for experimentation – to try new things, test a hypothesis, and validate the outcome. The TinkurBooth experience is built around four steps, which allow for many possibilities: Trigger + Interaction + Capture + Sharing.
Trigger + Interaction + Capture + Sharing
“Aren’t you going a bit too far? It’s just a photobooth!” is what you’re probably thinking right now. Let me explain. Thinking of each of these steps as separate but related, helps me think about the possibilities of changing one or more of the steps to create a different experience that engages different people in different ways. For example, one day the TinkurBooth could use a motion trigger while another day it could use a sound trigger that listens for a clap. As another example, TinkurBooth could capture a single black and white photo one day while another day it could take four photos and merge them into an animated GIF. In fact, my goal for the next year is to have a new version of TinkurBooth every month or two to see how each variation changes the user experience.
Trigger
This step is about the system knowing the user wants to interact with it (or convincing the user to interact with it). Examples of triggers could include:
-
Button: Pressing a button
-
Motion: Passing within a certain area (width and depth)
-
Sound: A loud sound or a certain type of sound (ex. a clap or whistle)
-
Light: A dramatic change in light, indicating something has changed
-
Distance and Movement: Coming within a certain distance
-
Time: A certain amount of elapsed time
-
Proximity: Being within a certain distance, although not necessarily within visual proximity (ex. think about using geo location)
-
Something You Have: Needing a smartphone to interact with it
-
Pattern: Press a button in a certain pattern
-
…
And let’s not forget about the possibility of mashups such as Distance + Time. For example, an early prototype of TinkurBooth required the user to be standing within a 2 foot area before it would take a picture. Too close and it would yell at you to stand back. Too far away and it would start to worry and ask you to come back. Really far away and it would ask you to come play. And if you stood in just the right spot for two seconds, with would take your picture.
Interaction
While the trigger could directly move to the capture step, there’s a great opportunity for interaction at this point to engage and delight the user. Examples of interaction could include:
-
Engage: In the Distance + Time example above, the photobooth is playful, using an LCD screen with text based on distance and time to engage the user.
-
Inform: The LCD screen could also be used to tell the user how to interact with the photobooth. In the above example, before starting taking pictures, the photobooth asked the user to make a funny face and then showed the user a random word such as “crazy” just before taking the picture.
-
Give and Take: Interaction could also consist of the user providing something, such as their Twitter username, in return for the photobooth taking a picture. The photobooth could then use the Twitter username to tag the photo.
-
…
Capture
The photography step of the equation. Examples of capture could include:
-
Timing: The time between pictures or a random time
-
Number of Pictures: The number of pictures taken or a random number
-
Shape of Pictures: Vertical, horizontal, square
-
Filters: Color, B&W, think Instagram
-
Lighting: Flash, No Flash, Ringflash
-
Post Processing: Keep pictures separate, merge photos into a 4 x 1 strip, merge photos into an animated GIF
-
…
Sharing
One of the greatest challenges with photography is doing something with all those pictures. Sharing is the part of the equation that allows people to share and remember moments. Examples of sharing could include:
-
Twitter: Posting to Twitter
-
Printing: Printing a photostrip
-
Emailing: Emailing to the user
-
…
Prototype
However, before experimenting with variations, I had to create a working prototype. There are lots of great tutorials and troubleshooting posts all over the Internet, so I won’t provide step by step instructions here. However, if you have specific questions, feel free to contact me.

One of the first animated GIF examples posted to Tumblr http://tinkurbooth.tumblr.com/ by TinkurBooth.
How It Works
The following is an overview of the TinkurBooth Platform workflow:
-
Run sudo python boothsnap.py script
-
Script monitors for motion
-
When motion is detected, four pictures are taken using the raspistill command and saved locally; code based on https://gist.github.com/benhosmer/5653641
-
The four photos are merged together using ImageMagick and saved locally as an animated GIF
-
The annimated GIF is uploaded to a Gmail account; code based on http://mitchtech.net/connect-raspberry-pi-to-gmail-facebook-twitter-more/
-
The If Then Then That (IFTTT) service monitors the Gmail account and runs macros to post the animated GIF to Tumblr (and thanks for Tumblr for being so awesome as to actually support annimated GIFs!)
Parts
-
Raspberry Pi Model B
http://www.adafruit.com/products/998 -
Raspberry Pi Camera Board
http://www.adafruit.com/products/1367 -
Raspberry Pi Cobbler
http://www.adafruit.com/products/1105 -
PIR Motion Sensor
http://www.adafruit.com/products/189 -
32GB SD Card
-
Latest Raspbian OS Image Download
http://www.raspbian.org/
Build
-
Follow the awesome Adafruit Raspberry Pi Tutorials
-
Prepare SD Card and Install Raspbian OS ://learn.adafruit.com/adafruit-raspberry-pi-lesson-1-preparing-and-sd-card-for-your-raspberry-pi
-
Configure Pi http://learn.adafruit.com/adafruits-raspberry-pi-lesson-2-first-time-configuration
-
Configure Network http://learn.adafruit.com/adafruits-raspberry-pi-lesson-3-network-setup
-
Configure VNC (so you can program from yoru desktop or laptop) http://learn.adafruit.com/adafruit-raspberry-pi-lesson-7-remote-control-with-vnc
-
Setup GPIO (General Purpose Input Output) Libraries http://learn.adafruit.com/adafruits-raspberry-pi-lesson-4-gpio-setup
-
Trying Sensing Some Movement http://learn.adafruit.com/adafruits-raspberry-pi-lesson-12-sensing-movement
-
- Setup and configure the Raspberry Pi Camera http://raspberrypi.werquin.com/post/43645313109/initial-setup-of-the-raspberry-pi-out-of-the-box
- Download the TinkurBooth source code from GitHub at https://github.com/TinkurLab/TinkurBooth
Helpful Tutorials
-
Raspberry Pi Setup Checklist
http://raspberrypi.werquin.com/post/43645313109/initial-setup-of-the-raspberry-pi-out-of-the-box -
Raspberry Pi Camera Setup and Configuration and Setup
http://www.raspberrypi.org/camera -
Code: Connecting Raspberry Pi to Gmail and IFTTT
http://mitchtech.net/connect-raspberry-pi-to-gmail-facebook-twitter-more/ -
Code: Raspberry Pi Timed Capture
https://gist.github.com/benhosmer/5653641 -
ImageMagick Documentation
http://www.imagemagick.org/Usage/ - Raspberry Pi Raspistill Command Reference
http://www.tinkurlab.com/2013/06/raspberry-pi-camera-command-list/
What’s Next
Stay tuned for future posts about TinkurBooth. Forth the 1st “TinkurBooth” of the month, I’m going to be creating a version that is activated by distance and uses an LCD screen to interact with the user asking them to play a game to act out a event that will be turned into an animated GIF.
And if you’re wondering about that Polaroid from Jim’s dorm room, here’s it is – Jim, Adam, and Val.

-Adam